In the guide I will show you how you can make a stencil and use it to spray paint a shape onto a shirt.
Go to link and download the Nelson County cookie cutter. https://www.thingiverse.com/thing:6549036
Feel free to print the cookie cutter and make awesome county shaped cookies. For this project we will be using the outline of the cookie cutter to cut out the shape of the county in a stencil.
Start up your 3d editor or go to www.tinkercad.com/
First start by creating a box and making it 1mm thick and the maximum width that will fit on your particular printer.
Import the cutter file and make sure you flip it so that the Nelson shape is correct.
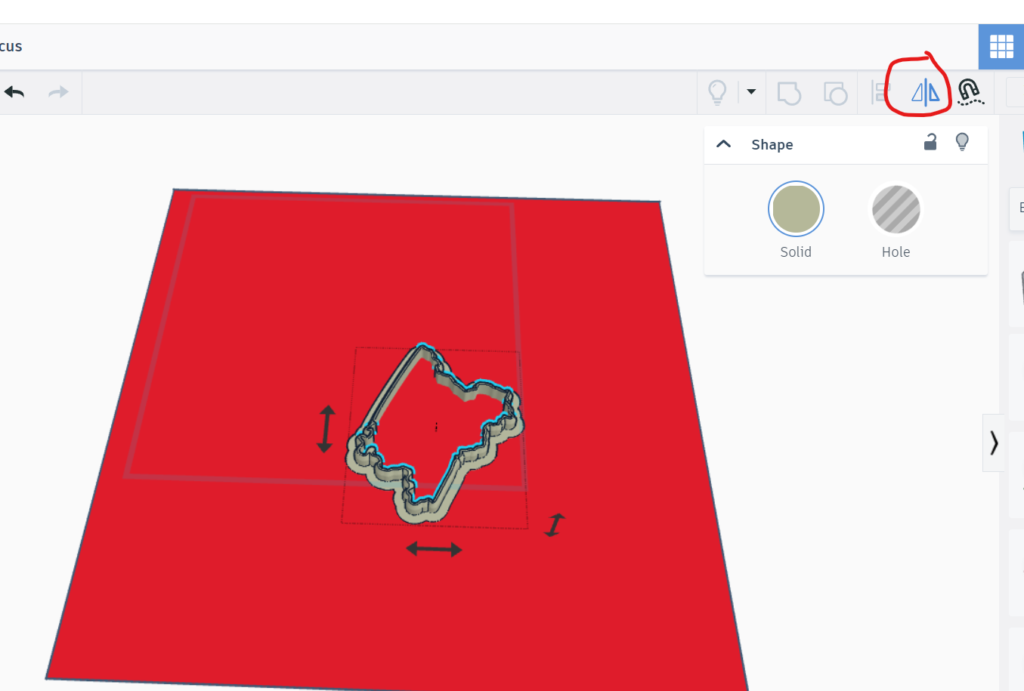
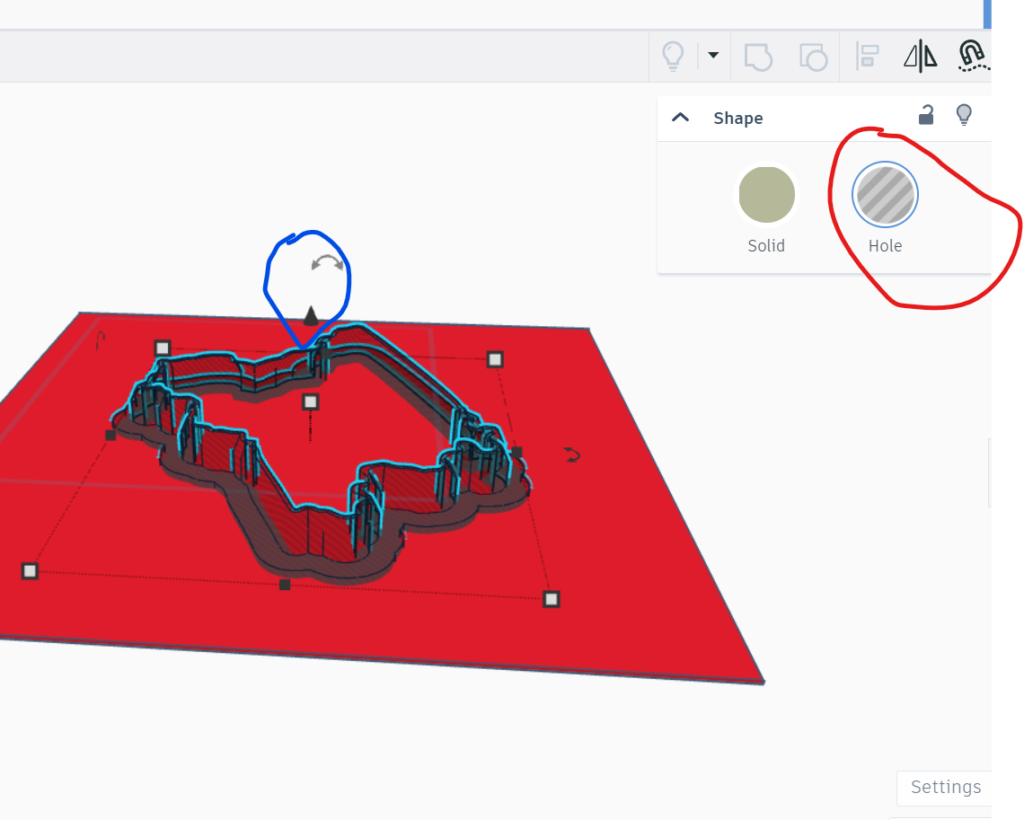
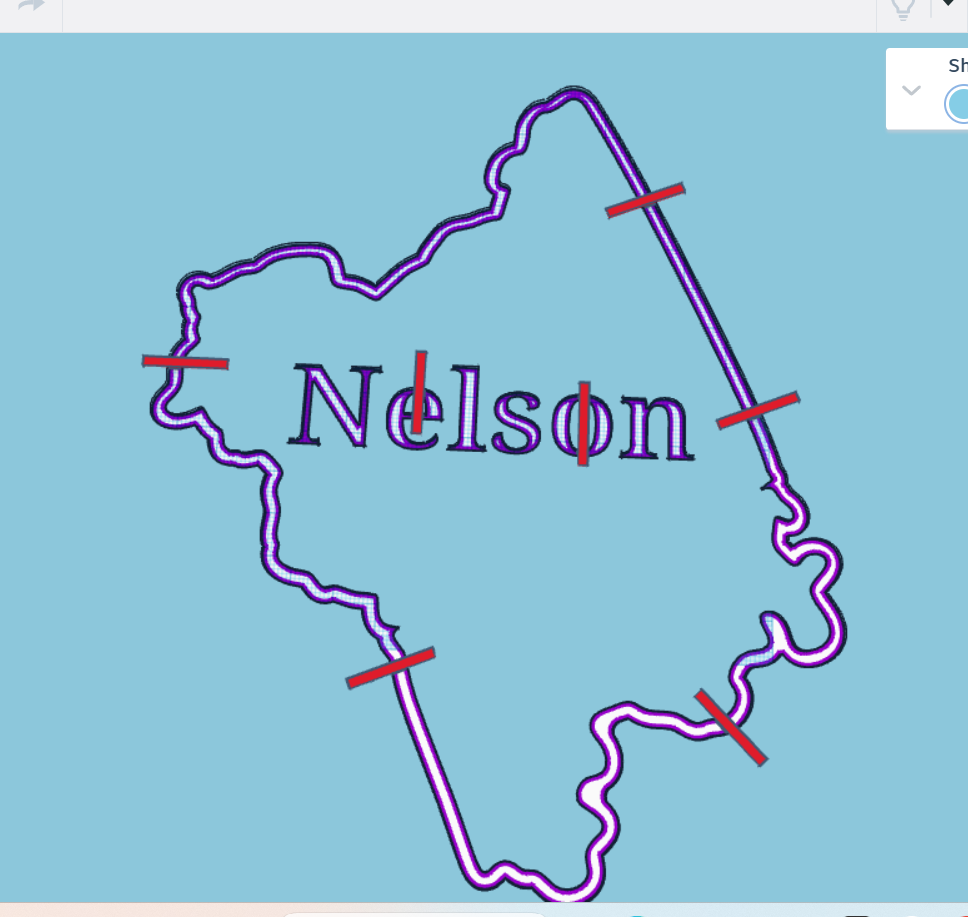
Move the cutter shape into a vertical position that will only include the straight parts of the cutter. Turn it into a hole and combine the two shapes.
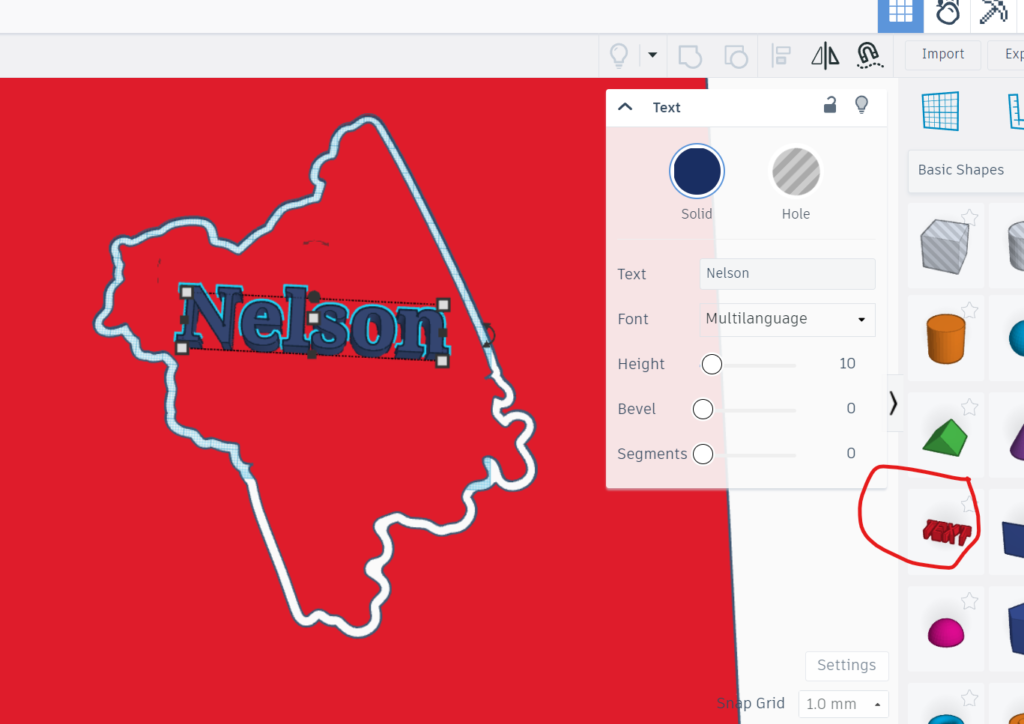
Next, we will add the text to the stencil. Choose a bold font to make sure the text is nice and readable. Turn it into a hole and combine the shapes.
Finally, you will need to bridge any pieces that are not connected to the main stencil. Use a rectangle and make it the same thickness as your stencil, 1mm. Make it 2-3 mm wide and as long as needed to bridge the individual pieces. See how I bridged the sections.
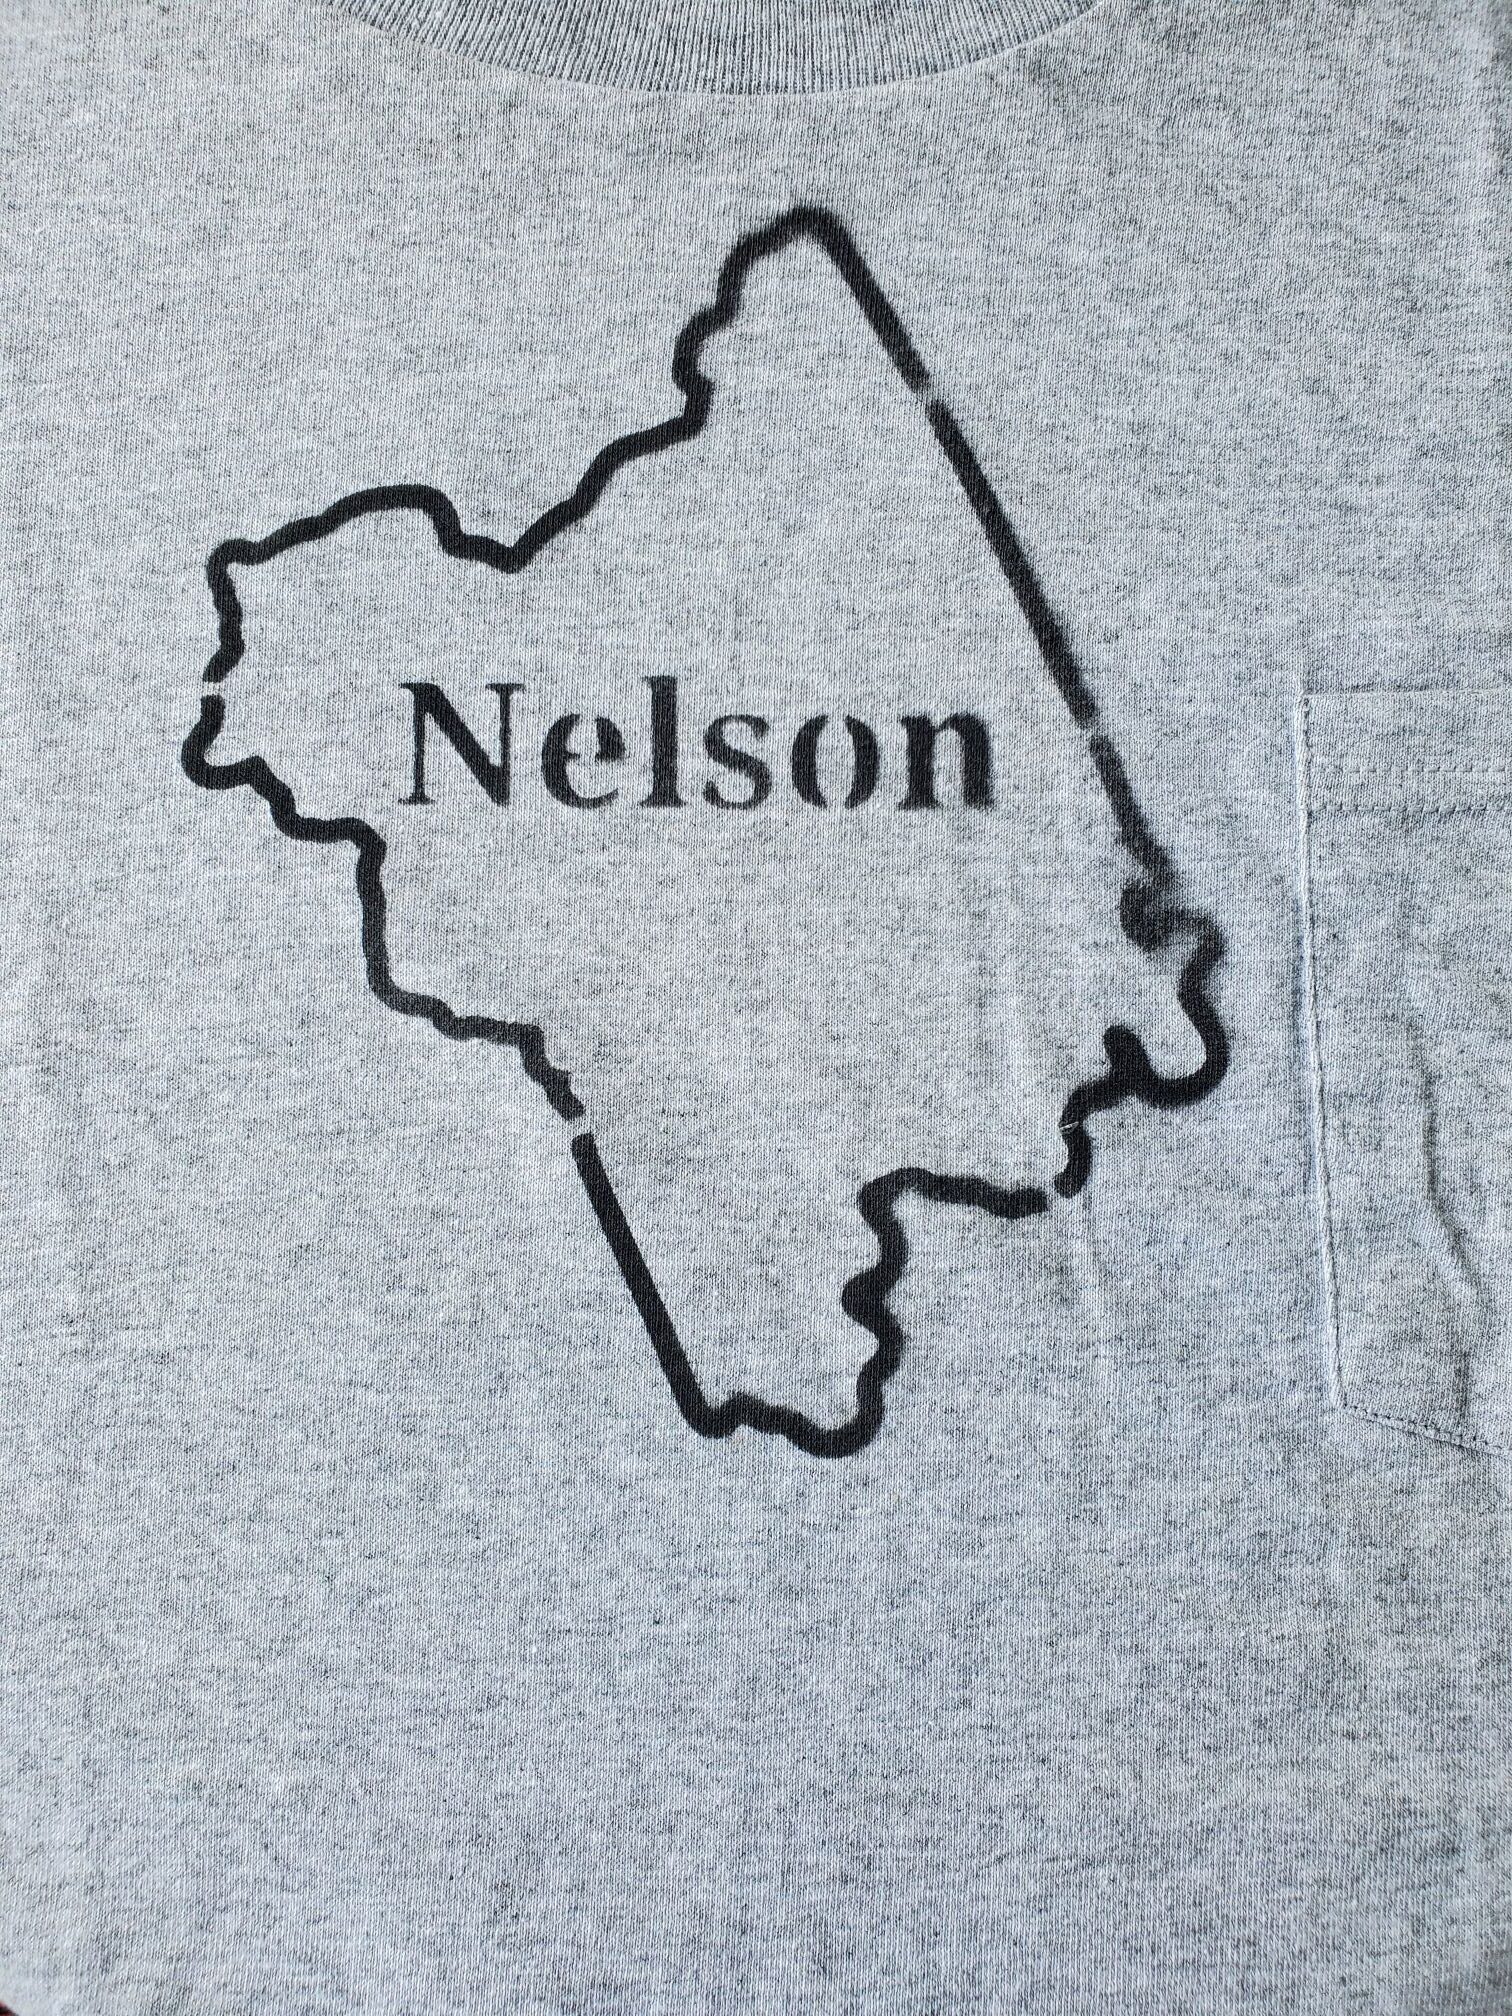
After printing prepare the shirt for painting. I like to insert cardboard behind the first layer to protect the back of the shirt and also to give a good flat surface to work on. I cut out a section from a piece of cardboard just big enough to reveal the stencil. I do this to protect the rest of the shirt from overspray.
For paint there are good fabric spray paints by Tulip. They are not a cheap paint but I have shirts that are several years old and haven’t faded much. I tried using cheap dollar store paint and it is quite faded after the first wash. I will continue to test various paints to find the optimal combination of affordability and performance. Let me know in the comments if you find a good brand.
Once you have all the prep done you will want to lightly spray it. Don’t try to add too much at once or it will start to run under the stencil. You can add more paint if needed but go slow. Also make sure the stencil is tight against the fabric. I had a little gap on the right side of mine which shows up on the shirt.
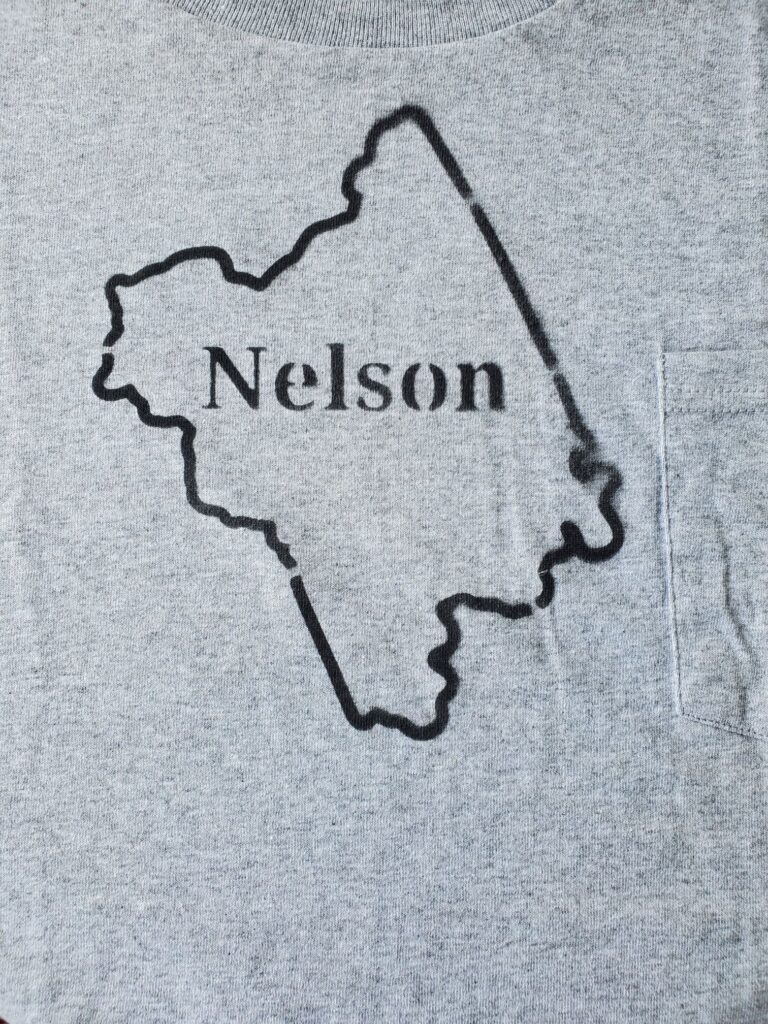
Enjoy your new shirt and make sure to post a picture of it and tell others how they can get make their own.
As always the completed file is available here. Nelson Stencil by Sunset3dcrafts – Thingiverse
This was made for a larger sized printer and you might have to adjust it to fit yours. Reach out if you would like it printed larger for your personal use.