
Supplies needed:
10mmx3mm neodymium magnet
Favorite filament
Procedure
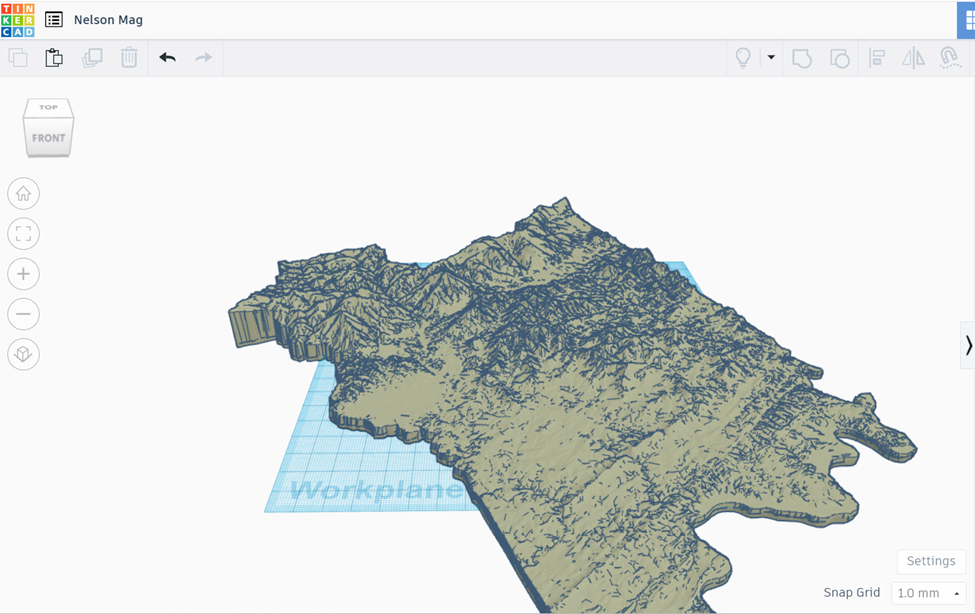
Find Nelson County model on Thingiverse https://www.thingiverse.com/thing:4976605 and download.
Use www.tinkercad.com to edit the model.
Import your model to begin working on it. This may take several minutes to process.
The blue plane is 200mmx200mm, much too large for a magnet. You will need to scale it down to a size you want. Click the model and click on one of the outer boxes to resize, you will want to hold shift while you do this to maintain the relative scale of all the other axis. If you mess up you can find an undo arrow at the top of the screen.
I chose a size of around 100 mm to fit on my small printer.
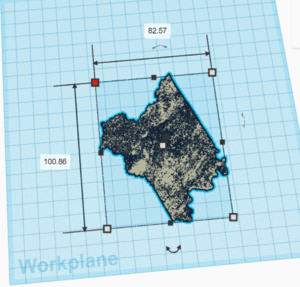
Click the model and click on one of the outer boxes to resize, you will want to hold shift while you do this to maintain the relative scale of all the other axis. If you mess up you can find an undo arrow at the top of the screen. I chose a size of around 100 mm to fit on my small printer.
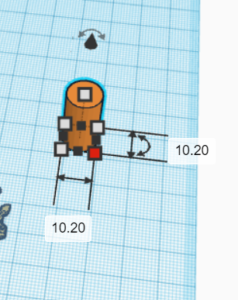
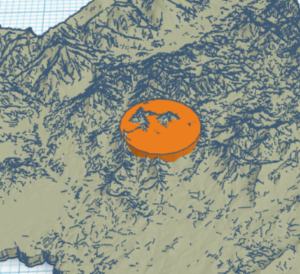
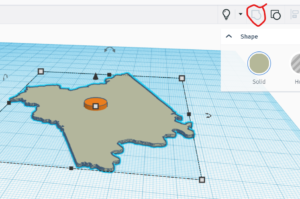
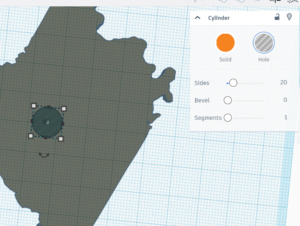
Grab a cylinder shape from the right side of the screen and drag it into your workspace. The magnet I use is a 10mmx3mm magnet, you may use a different size. Make the cylinder size 10.2 diameter and 3mm height. Type in the measurements after you click on the white box
Once it is the correct size you can center it in the county shape. This can be done by eye or click both shapes and then the icon circled. Round dots appear around the shapes. Clicking the middle ones will move the shapes together and center it.
You will likely find that the county shape is too thin to contain a magnet. You could just exaggerate the Z axis but then the mountains will become much too pointy.
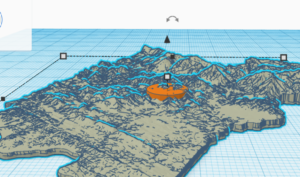
A better way is to create a thicker base for the magnet. Click the county shape and use the Ctrl D keyboard shortcut to duplicate the shape. Then move it up with the up arrow in the center of the shape until the magnet cylinder is covered.
There is likely a gap between the 2 shapes. We will fix this next. With the top shape selected use the lightbulb to hide the shape. Grab a transparent cube from the right and drag it off to the side of your shape. We will use this to remove the terrain and create a flat base. Scale the cut cube till it covers the entire shape. Using Shift during this scaling is not advised.
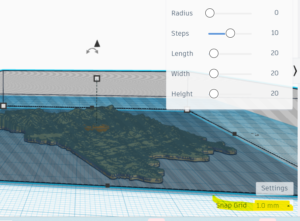
Move this cut box up slightly. 1mm is fine but if you want to move it less you can change the snap grid size to move the shape in smaller increments.
Click the county shape and while holding shift click the cut box. With both selected click group to combine two shapes. Now with the terrain gone you can scale the flat shape up to cover the magnet cylinder.
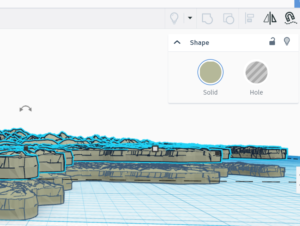
Now click the lightbulb to unhide the terrain. The last step is to find the magnet cylinder and turn it into a hole. You will have to view the bottom of the model to select it.
You can use the right mouse button to move the model around or use the view cube to quickly move to the bottom of the model.
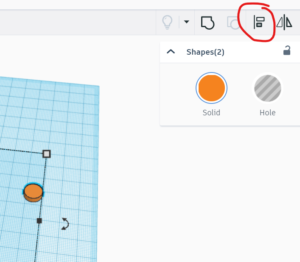
With the cylinder selected you can turn it into a hole. Finally select all the shapes and group. If you are having trouble selecting them all you can click outside the shape and drag the mouse to the opposite corner to select all.

Finally you can export the design to an .stl file to bring into your slicing software. In order for the terrain to appear smooth in your print it would be best to print this with a .1mm layer height or whatever detail preset you have. After you have the shape printed you will just need to glue in the magnet. Gel superglue works great on PLA prints available at our local Dollar General.
If you just want to skip to the end and print the magnet you can find it here. https://www.thingiverse.com/thing:6472069